A hoop house for your garden beds is a versatile tool you can use all year round. It can be used with greenhouse plastic, mesh netting, or shade cloth depending on the time of year you are gardening in. This DIY hoop house guide will show you step by step how to put one of these together.
This post may contain affiliate links. If you use these links to buy something we may earn a commission. Thanks.
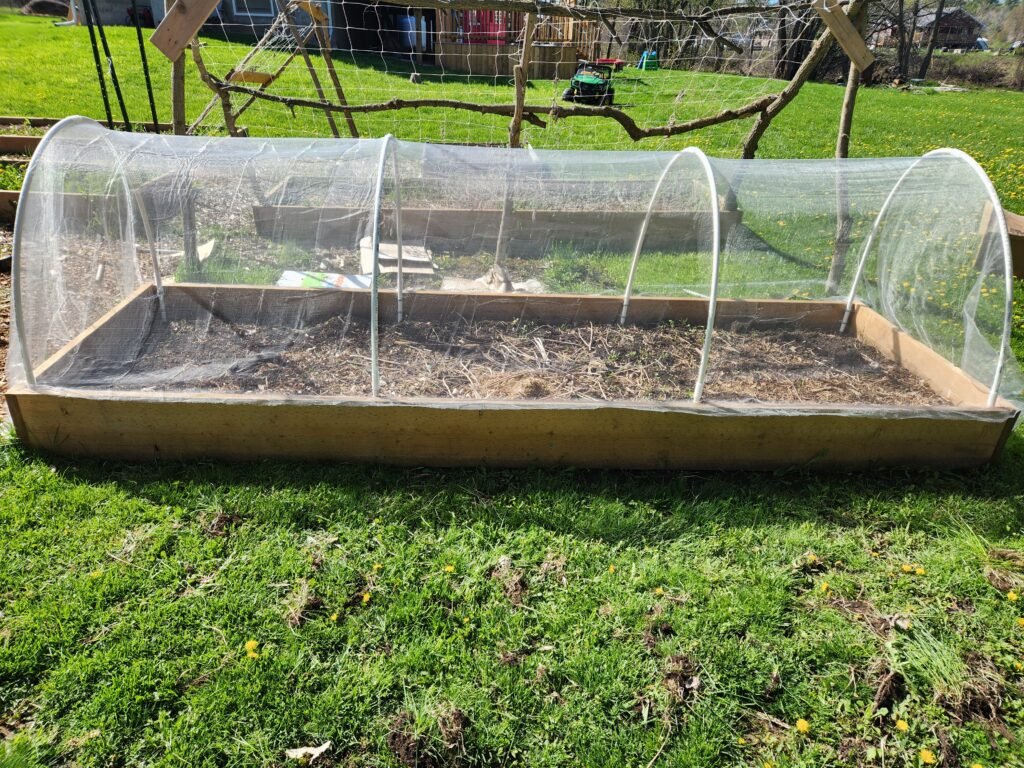
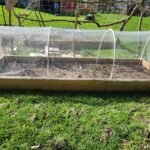
I built this hoop house on top of a 12×4 foot raised garden bed. The total cost to build one hoop house, after taxes, was just over $88.
The main reason we built this hoop house was to protect our Brassicas from getting eaten by bugs. Our entire Cabbage crop was lost last year. As an added bonus this will also prevent the bunnies from getting into our lettuce and spinach as well.
This project is super simple and shouldn’t take more than 45 minutes to put everything together. In my opinion this is the best cheap DIY hoop house you can build for a raised garden bed.

Materials Needed For Hoop House On Raised Garden Bed:
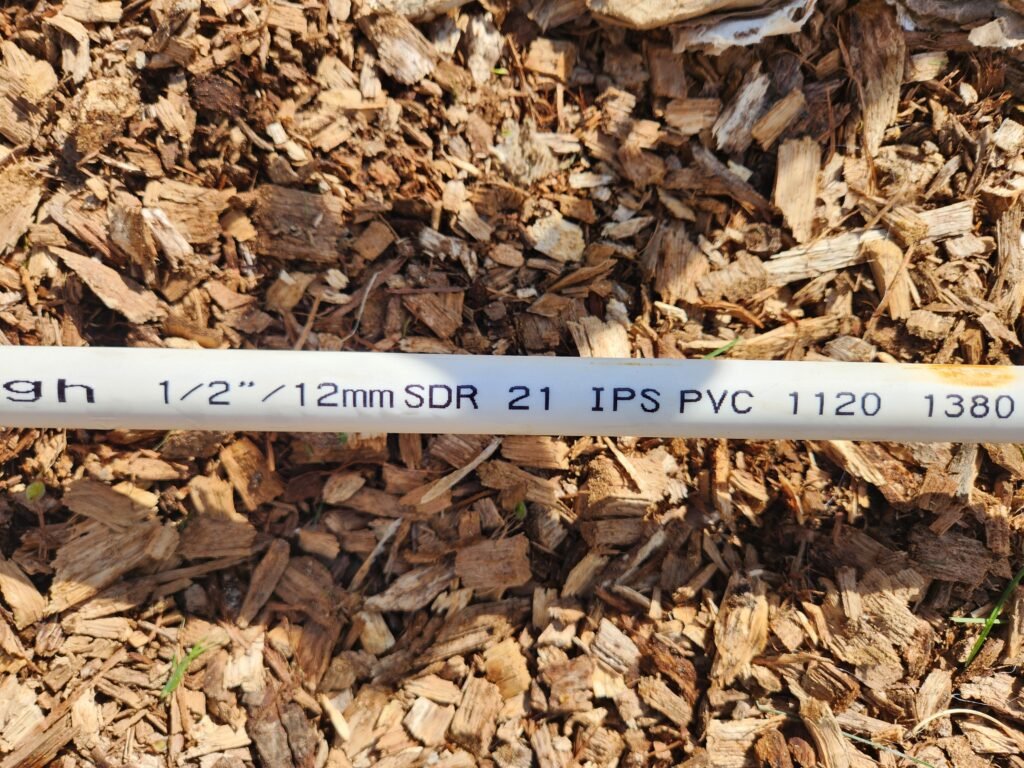
- 1/2inch 10 foot long PVC pressure pipe x 4
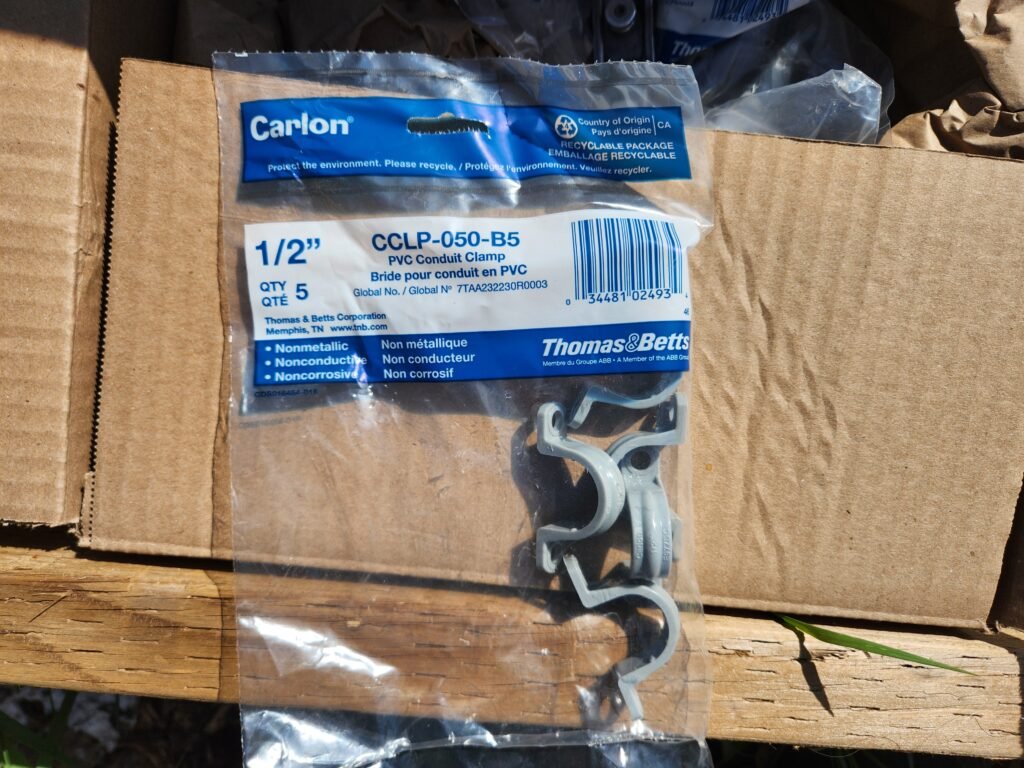
- 1/2 inch PVC conduit clamps x 16
- 10 foot x 20 foot garden mesh netting x 1
- 1/2 inch PVC pipe clamps x 12
- 1 1/4inch deck screws x 32
How To Build A Hoop House?
There’s only four steps to building a hoop house. Getting the PVC pipe the right length, attaching it to the garden bed, unfolding the mesh netting, and clipping it to the pipe. Here’s how I did it.
PVC Pipe Length Needed For Hoop House:
This is the only part of the construction that takes a little bit of though to get right the first time. If you’re using a 4 foot wide garden bed your calculation will be the same as mine. If you’d like to skip to my sizing cheat sheet click here.
Depending on the size of your garden bed, there will be a small cut needed to be made on the PVC pipe. For me this was to take 1 foot of length off of each PVC pipe. This was to make sure there was enough of the mesh netting to have some overlap on the sides of the garden bed.
To calculate how long of a PVC pipe you need there is a simple calculation you can do. You might remember this equation from high-school math class. We need to find out the circumference of a circle and then divide that by 2.
Circumference Calculation To Determine PVC Length:
The equation is (C = 2πr). Since we only need to know half of the circumference since the hoop house does not go underground the calculation we use is (C = πr). For me this worked out to 3.14×2 = 6.28. This is NOT the length of the PVC pipe we need. We also need to allow for extra length to be able to attach the PVC pipe to the side of the garden bed. I added 1 extra foot on each side for a total of 8.28 feet.
To make things easier on myself as this doesn’t need to be perfect, I cut my PVC pipe to 9 feet long. I’m on the side of, it’s better to leave a little extra than to cut off too much. This is also as long as I was able to leave it in order to have enough mesh netting to cover the garden.
Common Garden Bed Widths: PVC Length Calculations
To make things easier for everyone I’ve created a list of different widths of garden beds and how long I would recommend the PVC pipe be.
- 2 foot wide garden bed – 3.14×1+2 = 5.14 (6 foot PVC length recommended)
- 3 foot wide garden bed – 3.14×1.5+2 = 6.71 (7 foot PVC length recommended)
- 4 foot wide garden bed – 3.14×2+2 = 8.28 (9 foot PVC length recommended)
- 5 foot wide garden bed – 3.14×2.5+2 = 9.85 (10 foot PVC length recommended)
- 6 foot wide garden bed – 3.14*3+2 = 11.42 (12 foot PVC length recommended)
Attaching PVC Pipe To Raised Garden Bed:
Other than the calculation above, this is the hardest part of this build. There are a bunch of varieties of PVC clamps you can use for this. I picked these up from my local hardware store.
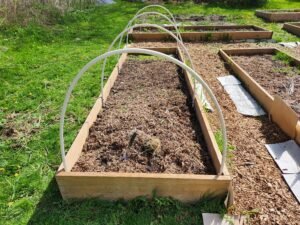
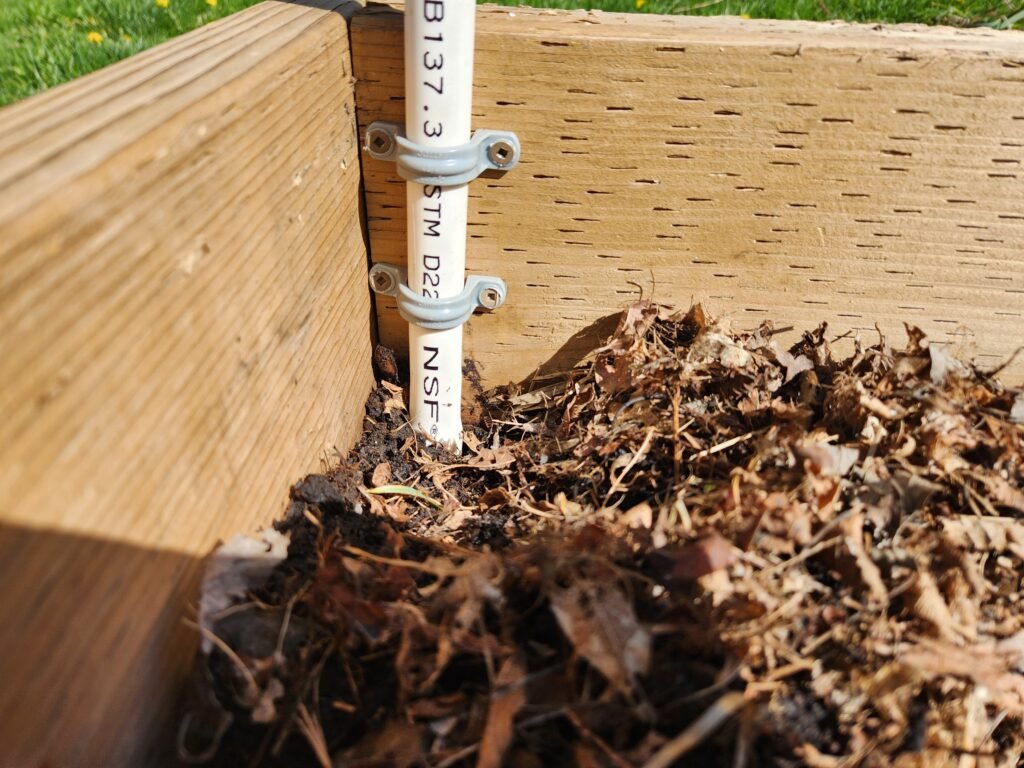
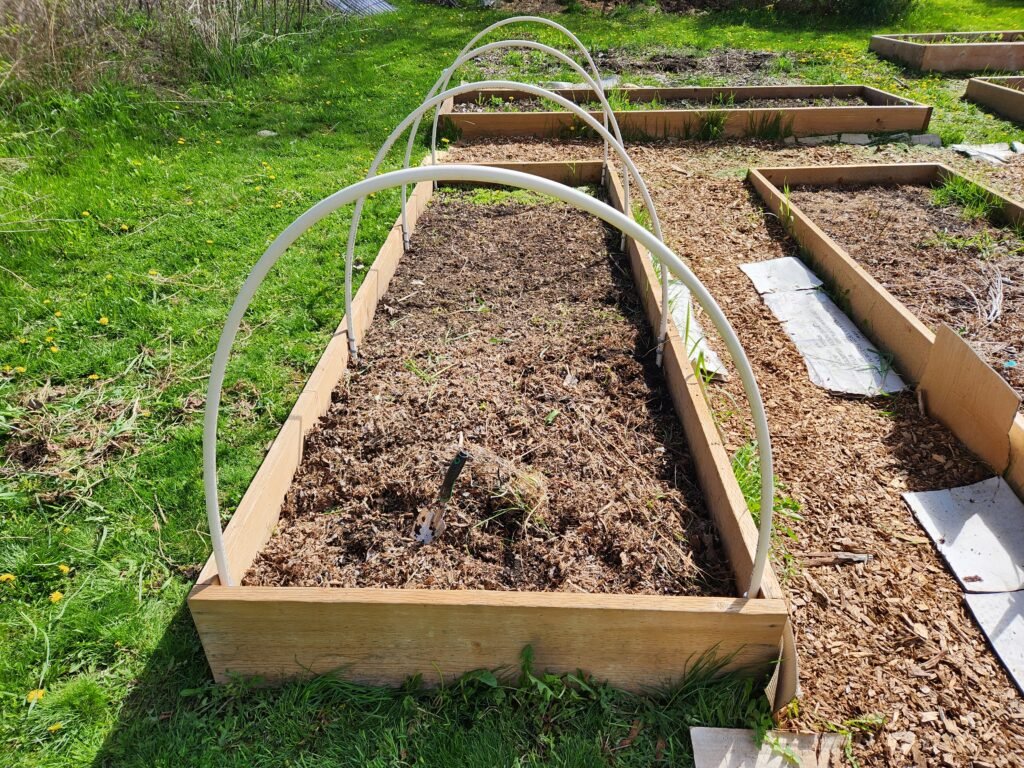
Attach each of the PVC pipes every 4 feet on each side of the garden bed. To attach the pipe to the garden bed use 2 PVC conduit clamps on each side. Using 2 clamps on each side give extra stability to the keep the PVC pipe upright easier.
Once you have all of the PVC pipes connected your raised bed should look like this.
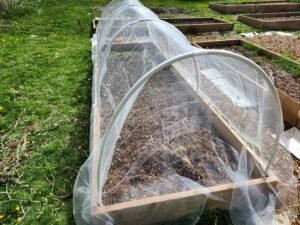
Cover Hoop House With Mesh Netting:
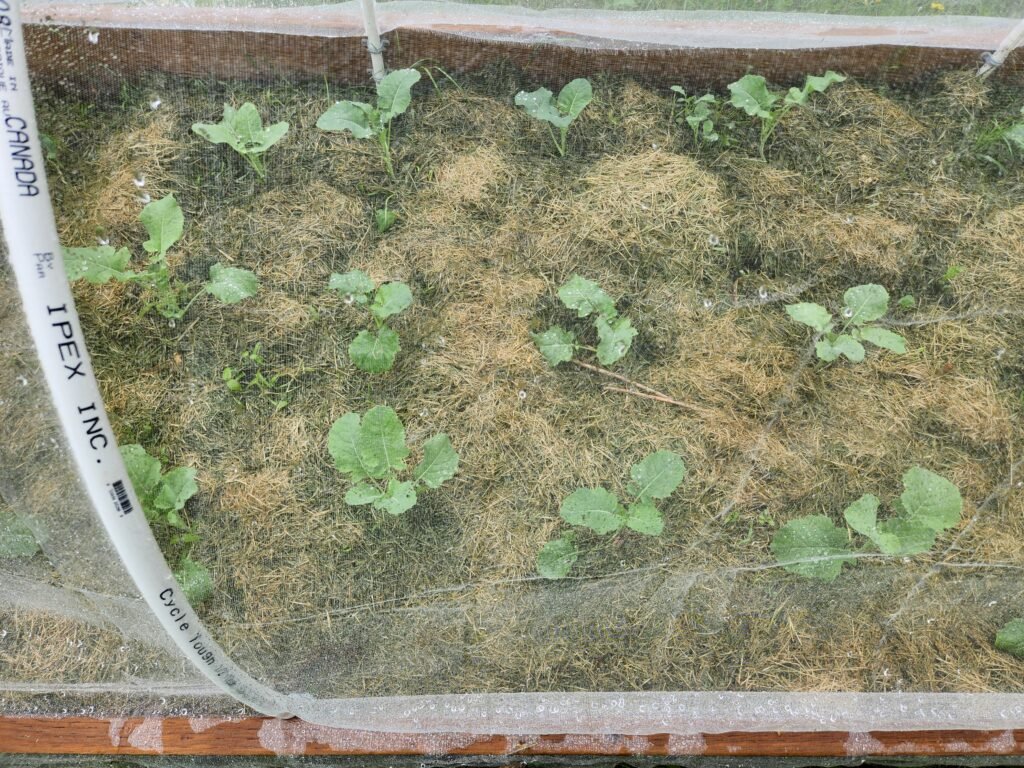
This part of the build is more finicky than difficult. The material of the mesh netting is very stretchy and a little cumbersome so it takes a bit of finessing to get right. Once it’s in place it is easy to deal with.
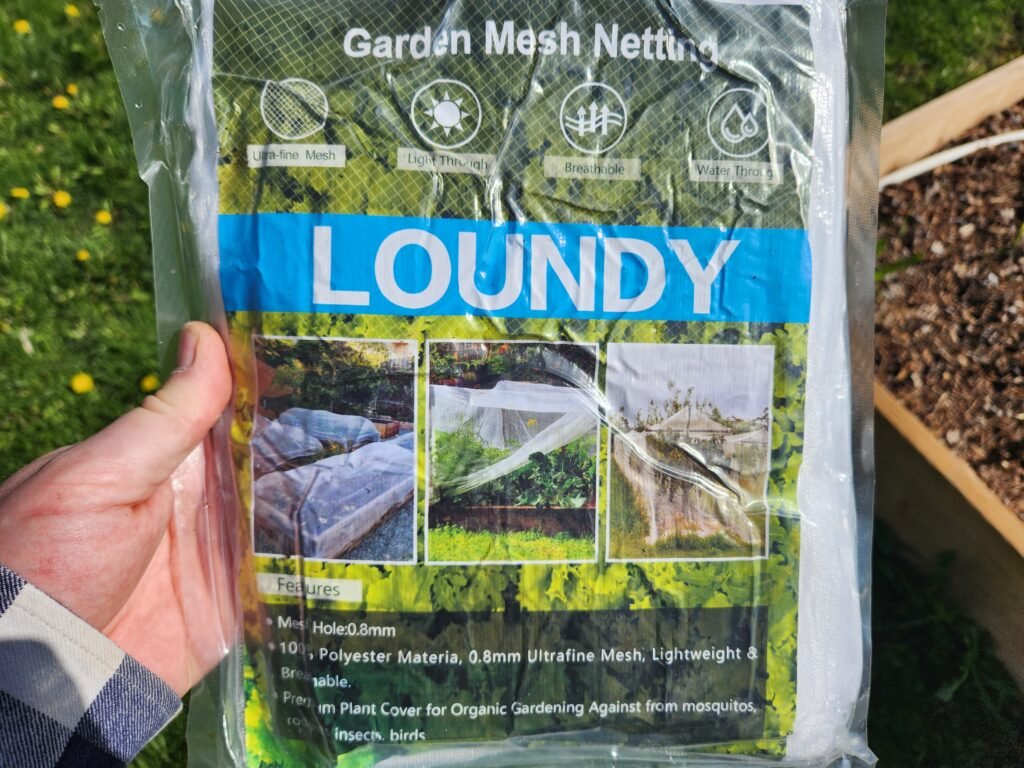
The mesh netting that I used to cover my hoop house is designed to let almost all light through and will let water through as well. It is purely meant to keep birds, bugs, and small animals from getting into your garden beds.
I will likely use this hoop house with some shade cloth when the summer heat comes as well as with greenhouse plastic once the late fall hits to extend our season.

Once you have the mesh netting in place, use PVC clamps to connect the netting to the pipe. These clamps easily slide over the pipe and have a strong enough connection they won’t just fall off.
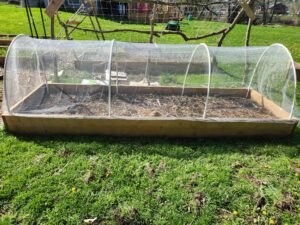
At the two end of the hoop house, to hold the netting in place, I used some large rocks to simply hold the netting to the ground. This allows me to have the netting covering 99% of the garden bed and still have it easily removable to get access to the garden.
To access the garden i remove the rock from one side and remove the lowest clips along the side I want access to. I then use the clips to hold the netting up at the top of the hoop so it’s not falling down while I’m trying to work.
Benefits Of A Hoop House Over A Garden Bed:
There are a few main benefits of building a hoop house over your garden
- Pest control: Whether this is against insects, birds, or mammals, a hoop house can provide security against any creatures getting in and eating your harvest.
- Temperature control: You can use a shade cloth, by itself or in conjunction with, a mesh netting to provide some control over the temperature of the garden bed. This is especially helpful when growing cool weather crops like lettuce and spinach.
- Extended growing season: Attaching greenhouse plastic to the hoop house will allow you to extend your growing season at the start of the year as well as the end. Getting a head start on your growing season any way possible is a huge help in providing the largest harvest as possible.
Frequently Asked Questions (FAQ) About Building A Hoop House:
The total cost was just over $88 CAD, including all materials and taxes. Costs may vary slightly depending on where you shop and whether you already have some supplies on hand.
This build should take less than 45 minutes. It’s a simple DIY project that doesn’t require any special tools or skills.
Absolutely! You can swap the mesh netting for shade cloth in summer or greenhouse plastic in the colder months to control temperature and extend your growing season.
Yes. Just adjust the PVC pipe length according to your garden bed width. There’s a handy sizing cheat sheet in the article to help you determine the right length.
The mesh netting keeps out cabbage moths, birds, and even small animals like rabbits. It’s especially useful for protecting crops like lettuce, spinach, and Brassicas.
Yes! The netting is held in place with clips and rocks, so it can easily be lifted or unclipped when you need to tend to your plants.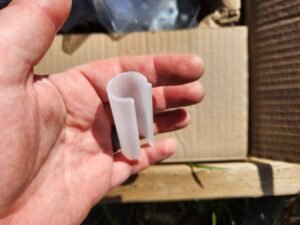
When properly clamped and secured, it holds up well under normal weather conditions. For high winds, you may want to reinforce the frame or add extra anchors.
Conclusion:
This was a very simply build and I know it will provide the value back in fresh vegetables that it cost to build. If you’ve got any question leave them in the comments below. Check out our growing guides for inspiration on what to put in your hoop house when you build one.
How To Build The Best Cheap Garden Hoop House
Equipment
- 1 Saw (anything to cut PVC)
- 1 Drill
Materials
- 4 piece 10 foot 1/2 inch PVC pipe
- 1 piece 10×20 foot mesh netting
- 16 piece 1/2 inch PVC conduit clamp
- 32 piece 1 1/4 inch deck screws
- 12 piece 1/2 inch PVC clamp
Instructions
- Attach each of the PVC pipes every 4 feet on each side of the garden bed. To attach the pipe to the garden bed use 2 PVC conduit clamps on each side. Using 2 clamps on each side give extra stability to the keep the PVC pipe upright easier.

- Once you have all of the PVC pipes connected your raised bed should look like this.
- Cover Hoop House With Mesh Netting
- Once you have the mesh netting in place, use PVC clamps to connect the netting to the pipe. These clamps easily slide over the pipe and have a strong enough connection they won’t just fall off.
- At the two end of the hoop house, to hold the netting in place, I used some large rocks to simply hold the netting to the ground.
- To access the garden i remove the rock from one side and remove the lowest clips along the side I want access to. I then use the clips to hold the netting up at the top of the hoop so it’s not falling down while I’m trying to work.