A warm cup of tea is something we all drink year round. Whether that be in the morning, a midday slump or as a way to to relax before bed. Tea, whether prepacked or loose-leaf, is becoming just as expensive as coffee these days. And let’s be honest – who really knows what else they might be putting in the tea when we buy it from the store. It’s so easy to make your own tea at home, using plants you grow right outside your door. I’ll show you how to make your own – completely organic – DIY tea bags so you can have them prepacked for yourself or as a beautiful homemade gift idea.
This post may contain affiliate links. If you use these links to buy something we may earn a commission. Thanks.
Why Make Your Own Tea Bags?
If you love tea and enjoy growing herbs and preserving them, learning to make your own tea bags is a natural next step.
- Save money and reduce waste.
- Customize each blend for flavor and health – chamomile for calm, mint for digestion, raspberry leaf for balance.
- Control what goes into your tea – no artificial flavors or fillers.
- Perfect for thoughtful, easy homemade gifts or cozy winter prep.
Homemade tea bags let you choose your herbs, avoid additives, and create eco-friendly tea blends that fit your needs.
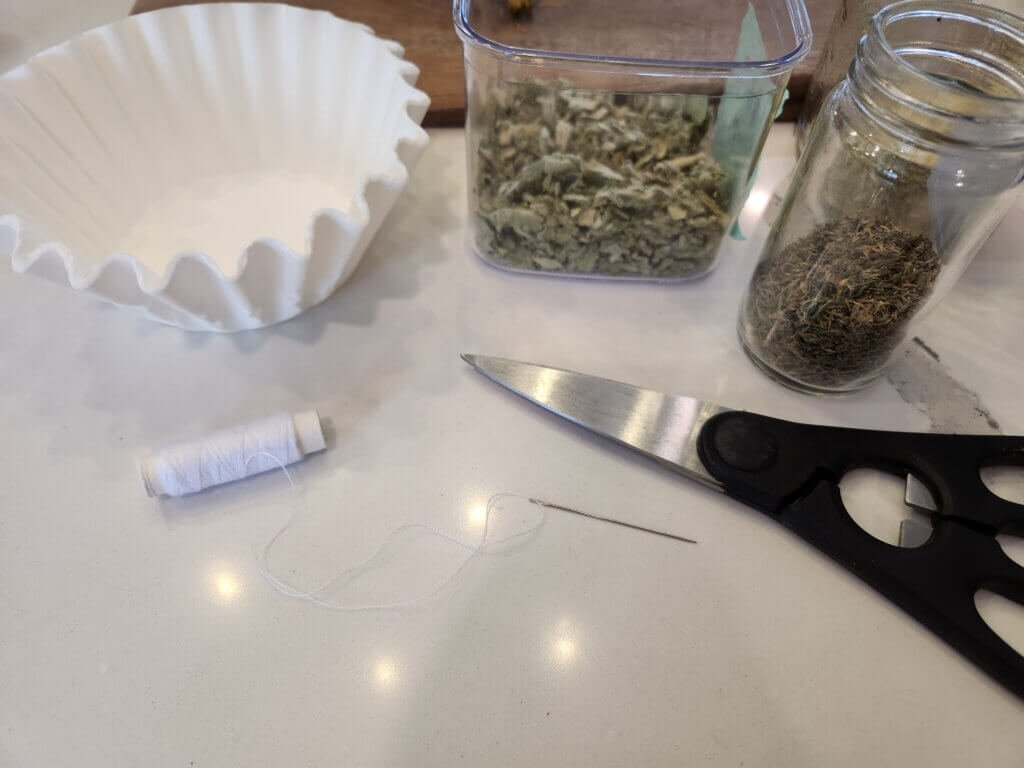
What You’ll Need To Make Tea Bags
You don’t need fancy equipment – just a few simple, kitchen-friendly supplies:
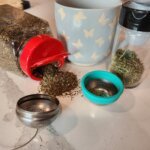
- Unbleached coffee filters, muslin, or cheesecloth
- Cotton thread or food-safe twine
- Needle
- Scissors
- Small tags or labels (I just used the excess coffee filter cut-offs with scotch tape)
- Pen
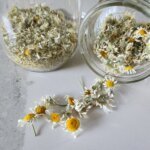
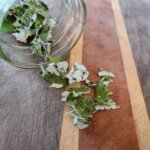
- Dried herbs (try chamomile, mint, dandelion, or mullein – all perfect for tea!)
You can use coffee filters, cheesecloth, or muslin fabric tied with string for an easy homemade tea bag alternative.
Step-by-Step: How to Make Homemade Tea Bags
Making homemade tea bags is as easy as a little folding and tying. Here’s how:
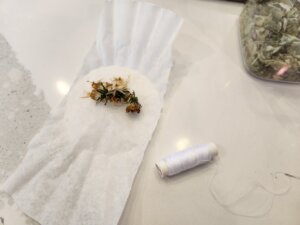
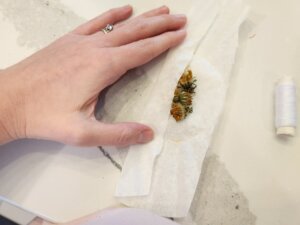
- Cut your coffee filter or fabric into squares or rectangles.
- Place about 1–2 teaspoons of dried herbs in the center.
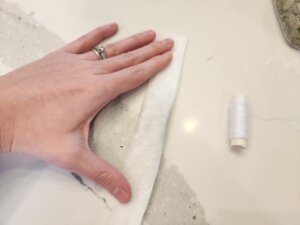
- Fold in the sides, then fold together the two top flaps.
- Fold down the top flap twice to ensure it’s secured.
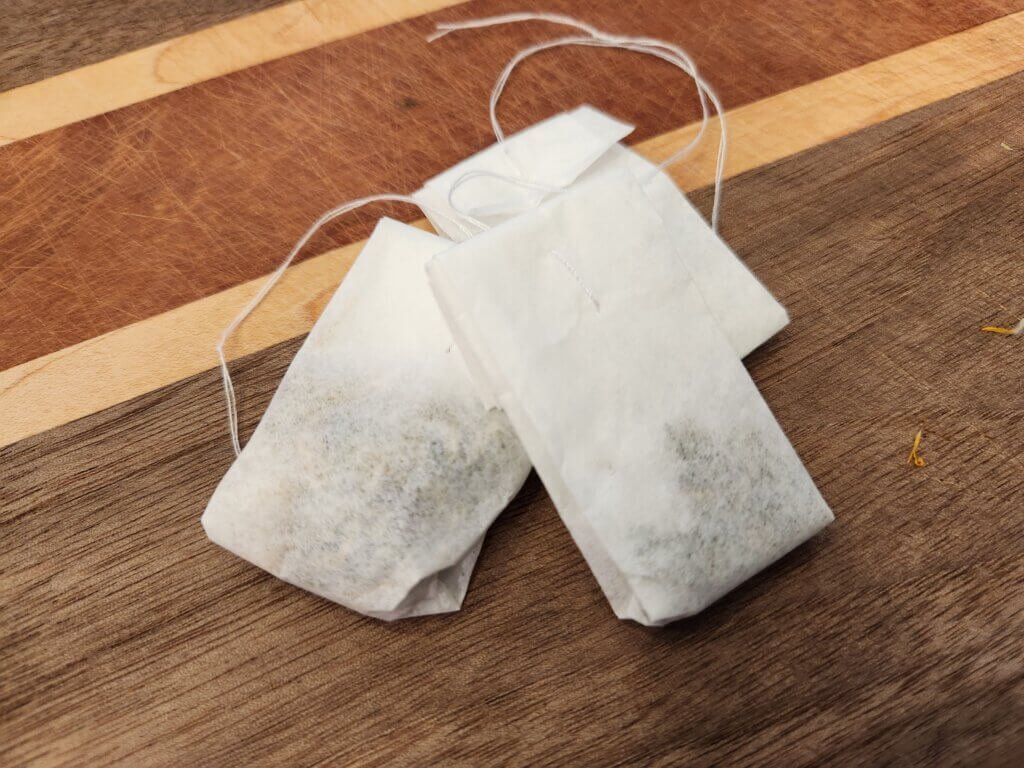
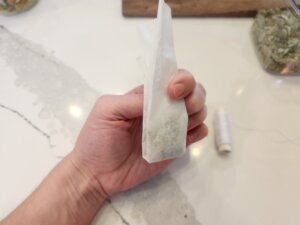
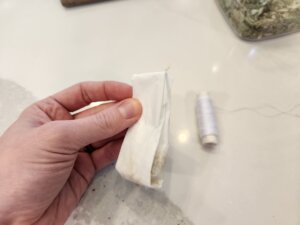
- Tie securely with twine, leaving a little string tail if you’d like to add a tag.
- OR – Using a needle and thread, create one knot at the top of the filter, then thread your needle through another spot 1cm below that. Connect the needle through the first hole you made so when you tighten the thread, the knot holds everything together. Leave a little string tail if you’d like to add a tag or just to have a long string.
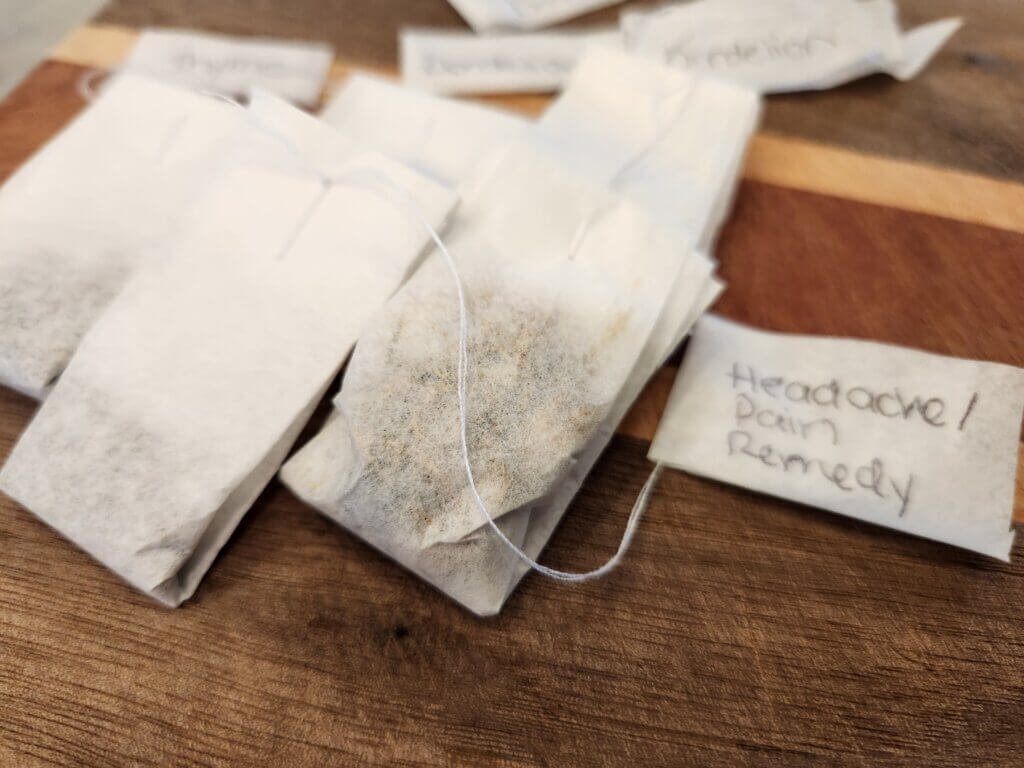
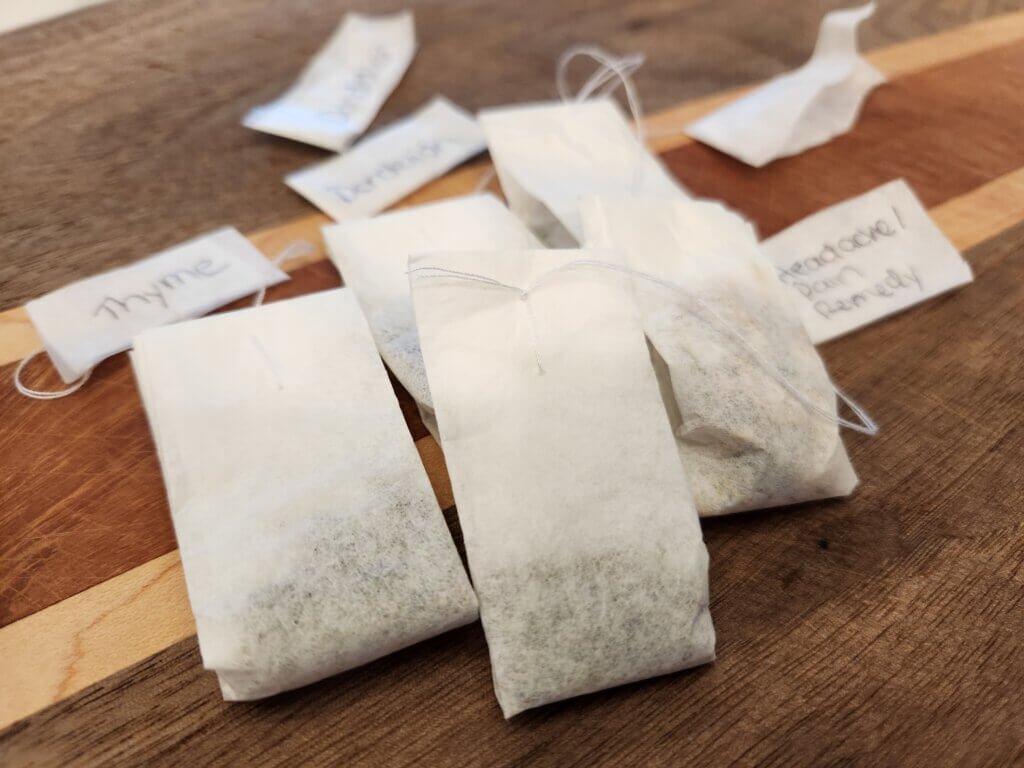
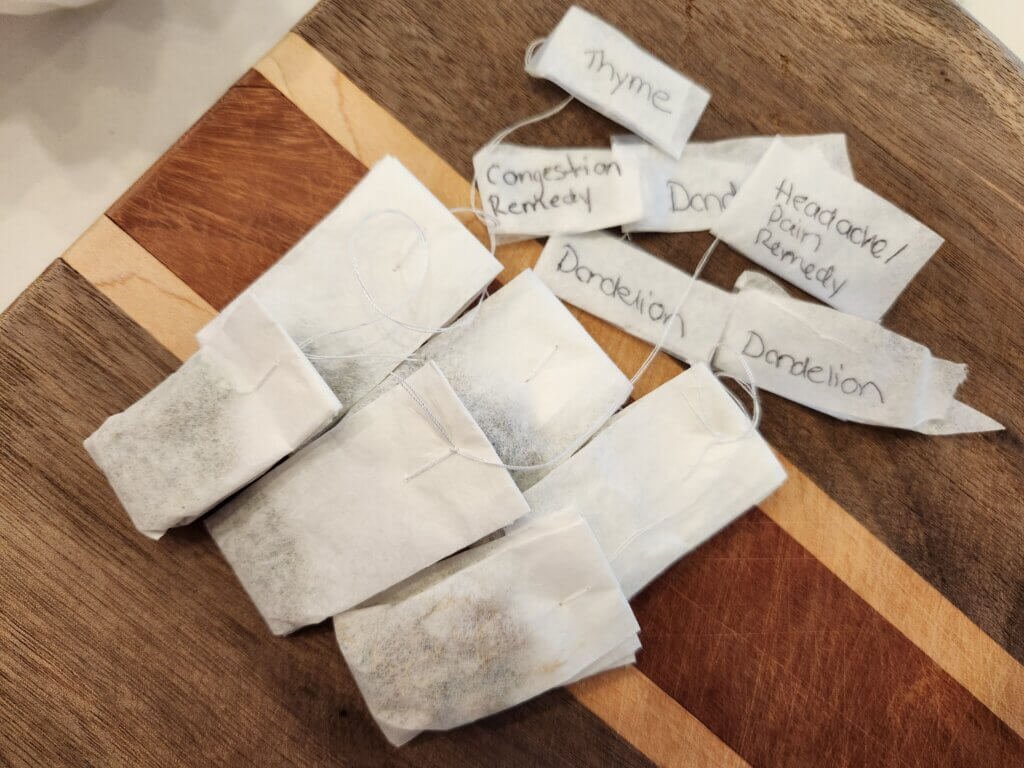
- Label each bag – especially if you’re gifting them or mixing blends.
Tip: If you grow your own herbs, dry them in a dehydrator at 105oF for 48 hours until they are dry/brittle. Or leave on a paper towel on a baking sheet to dry out in the sun for 7-10 days, until they are dry/brittle.


Herbal Tea Blends to Try
Once you’ve mastered the basics, the fun begins – mixing and matching herbs for custom blends. Here are some favorites from the garden:
- Chamomile Tea – calming and sleep-friendly
- Mint Tea – bright and digestive
- Dandelion Tea – digestive support
- Goldenrod Tea – reduces inflammation
- Mullein Tea – Mucous expectorant
- Thyme Tea – mucous expectorant
- Congestion Remedy (Thyme and Mullein) – Mucous expectorant
- Ginger, Honey & Lemon Tea – Ideal concoction when sick
- Basil & Rosemary Tea – for pain relief (headaches)
- Red Raspberry Leaf Tea – for Women’s health
Tip: Add medicinal tinctures you’ve made into your teas (along with raw honey – it has antiviral and antibacterial properties) for added medicinal benefits! I always add my Goldenrod, Mullein or even Garlic tinctures into my teas for the added benefits and it doesn’t impact the taste.
How to Store Homemade Tea Bags
To keep your homemade tea bags fresh and flavorful:
- Store them in an airtight jar or tin.
- Keep in a cool, dark place away from moisture or direct sunlight.
- Label each batch with the herb name and date.
- Use within 6–12 months for the best aroma and taste.
- Use a silica gel pack for extend shelf-life.
FAQ About Homemade Tea Bags
Yes – if you use muslin or fabric, simply empty, rinse, and dry before using again. If using a coffee filter, no.
Yes. Fresh herbs contain moisture that can cause mold inside sealed tea bags. Always dry them completely first.
Typically 5–10 minutes, depending on the herb and how strong you like your tea. (Tip: cover with a plate to enhance the steeping process to get all the medicinal benefits). 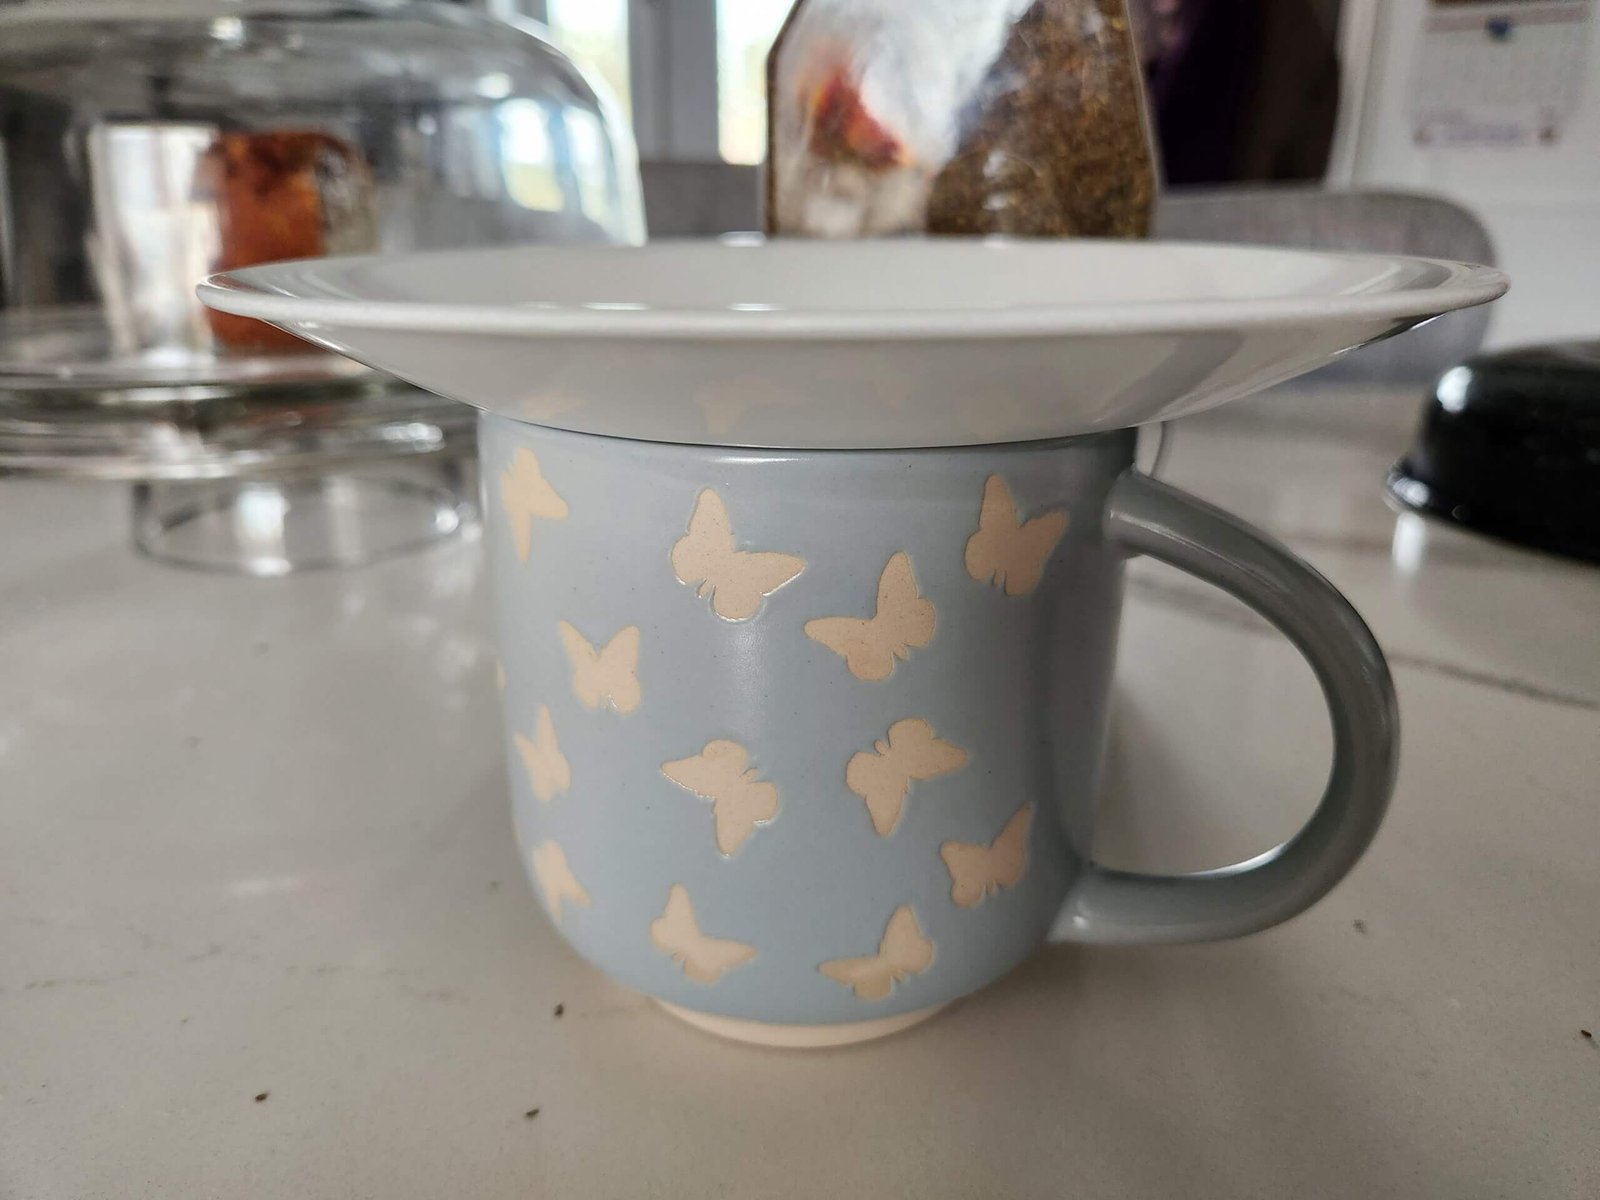
Absolutely! Use herbs like chamomile, mint, lemon balm, or raspberry leaf for naturally caffeine-free blends.
Final Thoughts
Making your own tea bags turns a quiet cup into something more personal – grown, dried, and blended by your own hands. Whether it’s chamomile for calm evenings or mint for busy mornings, homemade tea bags are one of the simplest joys of living close to nature.
It’s a lovely way to use your harvest, reduce waste, and craft something cozy you can sip or share – a little garden comfort in every cup.
Want to know more about medicinal herbs? Explore our Medicinal Herbs Hub for growing guides and natural remedies you can make at home. Don’t forget to join our newsletter for seasonal reminders and garden tips straight to your inbox!
We also have plenty of growing guides, seed saving guides and recipes. We are growing our website with more articles all the time, and we invite you to grow with us. If you have any questions about chamomile or would like to share some of your knowledge with us please leave a comment below. Happy Gardening!