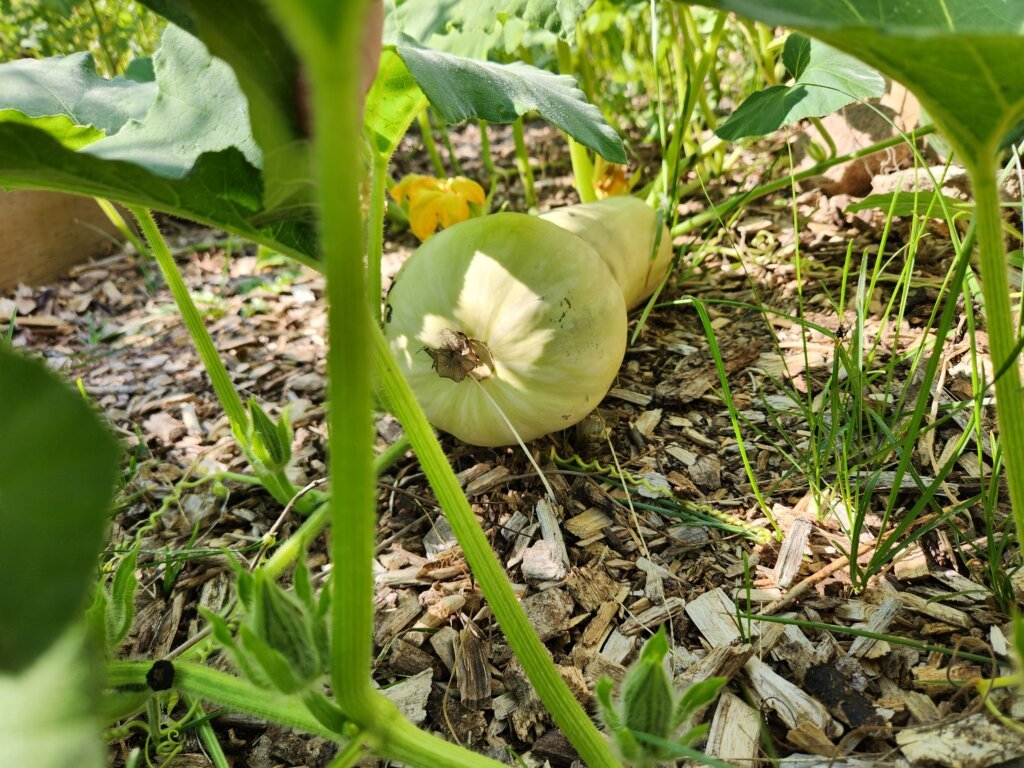
We’ve been growing butternut squash in our Zone 5 garden for several years, and it has become one of our favourite winter squashes to grow. The plants take up plenty of space, but a few healthy butternut squash plants can give you a harvest that lasts well into the winter.
This post may contain affiliate links. If you use these links to buy something we may earn a commission. Thanks.
Learning how to grow butternut squash in Zone 5 is mostly about getting the timing right. Butternut squash needs a long, warm growing season, and here in Ontario we only have so many frost-free days to work with. We like to start our butternut squash seedlings indoors to give the plants a head start before transplanting them into the garden once the weather warms up.
In this guide, we’ll walk through how we grow butternut squash from seed to harvest, including when to start your seeds, how to plant butternut squash, spacing, watering, pollination and how to tell when your squash is finally ready to harvest.
When To Plant Butternut Squash In Zone 5
In Zone 5, our last frost date typically falls somewhere between the middle and end of May. Timing is one of the most important parts of growing butternut squash. The plants grow quickly once seeded, but if they’re planted outdoors too early, a late frost can easily kill them.
If you’re planning the rest of your garden too, our Zone 5b planting schedule breaks down what we start, plant and harvest throughout the entire growing season.
Starting butternut squash too early indoors can cause problems too. The seedlings grow quickly and can become root bound if they’re left in a pot for too long. The goal is to give them enough of a head start indoors without starting so early that they outgrow their pots before it’s warm enough to plant them outside.
When To Start Butternut Squash Seeds Indoors
We prefer to start our butternut squash seeds indoors because it gives the plants a week or two head start on the short growing season we have in Zone 5.
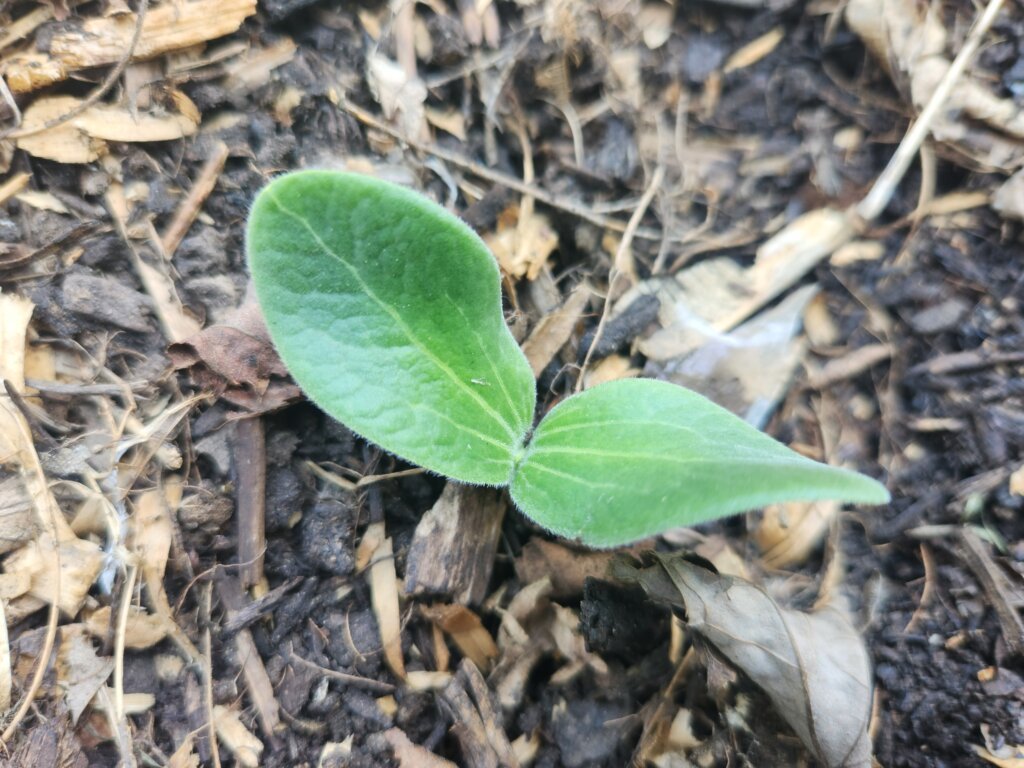
We start our butternut squash seeds indoors around May 10th every year, which is normally around our last frost date. Butternut squash grows quickly from seed, so we only give the seedlings about 1–2 weeks of growth indoors before getting them ready to transplant outside.
When To Transplant Butternut Squash Outside
Timing when you transplant butternut squash outdoors in Zone 5 is just as important as when you start the seeds indoors. Plant them too early and they could struggle with the cold or even die from a late frost.
Plant them too late and the seedlings could become root bound, or you could run the risk of not having enough growing season left for the fruit to fully develop.
The perfect time to transplant butternut squash outdoors is after all risk of frost has passed, the soil has warmed up and your seedlings have been properly hardened off. Make sure you’re checking your local forecast when thinking about transplanting instead of blindly following the last frost date on your calendar. We’ve learned this the hard way.
To harden off butternut squash seedlings, about 7–10 days before transplanting, begin gradually exposing the seedlings to outdoor sunlight, wind and temperatures. Increase their time outside each day.
Can You Direct Sow Butternut Squash In Zone 5?
It is possible to direct sow butternut squash in Zone 5. However, starting the seeds indoors gives the plants a much-needed head start during our relatively short growing season.
We’ve grown butternut squash both ways, starting seeds indoors and direct sowing them in the garden. Both methods can work, but when possible, we prefer starting them indoors. It gives us better control over germination and gives the seedlings a head start before they’re planted outside.
How To Plant Butternut Squash
Like pumpkins, butternut squash are part of the Cucurbita family. This family includes summer and winter squash, pumpkins and gourds. Like most squash, butternut squash plants need plenty of space to spread their vines and lots of sunlight throughout the growing season.
Before planting your butternut squash, it’s important to choose the right location in your garden. You’ll need to consider how much sun they’ll receive, the soil they’re planted in and, most importantly, where you’re going to let those long vines grow.
How Much Sun Does Butternut Squash Need?
Butternut squash requires full sun, with at least 6–8 hours of direct sunlight each day. The plants love warm weather and plenty of sunshine, so choose one of the sunniest areas of your garden for the best growth and fruit production.
What Kind Of Soil Does Butternut Squash Need?
Butternut squash likes loose, well-draining soil with a soil pH between 6.0 and 6.8. We use this soil tester to make sure our soil’s pH is in the right range.
Butternut squash plants are heavy feeders, so before planting, amend your soil with high-quality organic matter or compost if needed. This will help provide the nutrients the plants need throughout their long growing season.
How Much Space Does Butternut Squash Need?
Butternut squash needs a lot of space. The plants grow long, sprawling vines that continue to spread throughout the growing season. We plant our butternut squash at least 3–4 feet apart and make sure there is plenty of open space around them for the vines to grow.
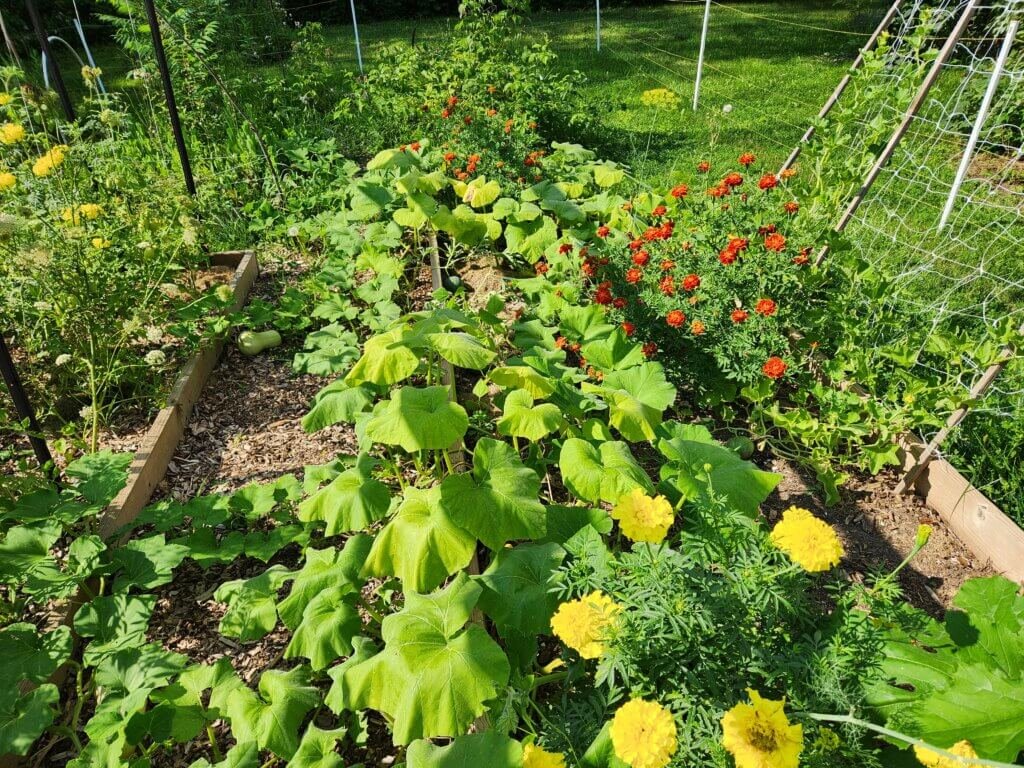
Depending on the variety and growing conditions, the vines can easily grow 10–15 feet long and sometimes much longer. Be prepared for them to spread well beyond where they were originally planted and take over entire sections of your garden.
Can You Grow Butternut Squash In Raised Beds?
Yes, you can. This is actually how we grow butternut squash here at DBS Farm Wilson.
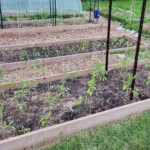
Even though you’re planting butternut squash in a raised garden bed, that doesn’t mean you need to sacrifice the entire bed to the vines. We grow ours in a 12×4-foot raised garden bed, planting one butternut squash in each corner and directing the vines over the sides of the bed into the surrounding areas.
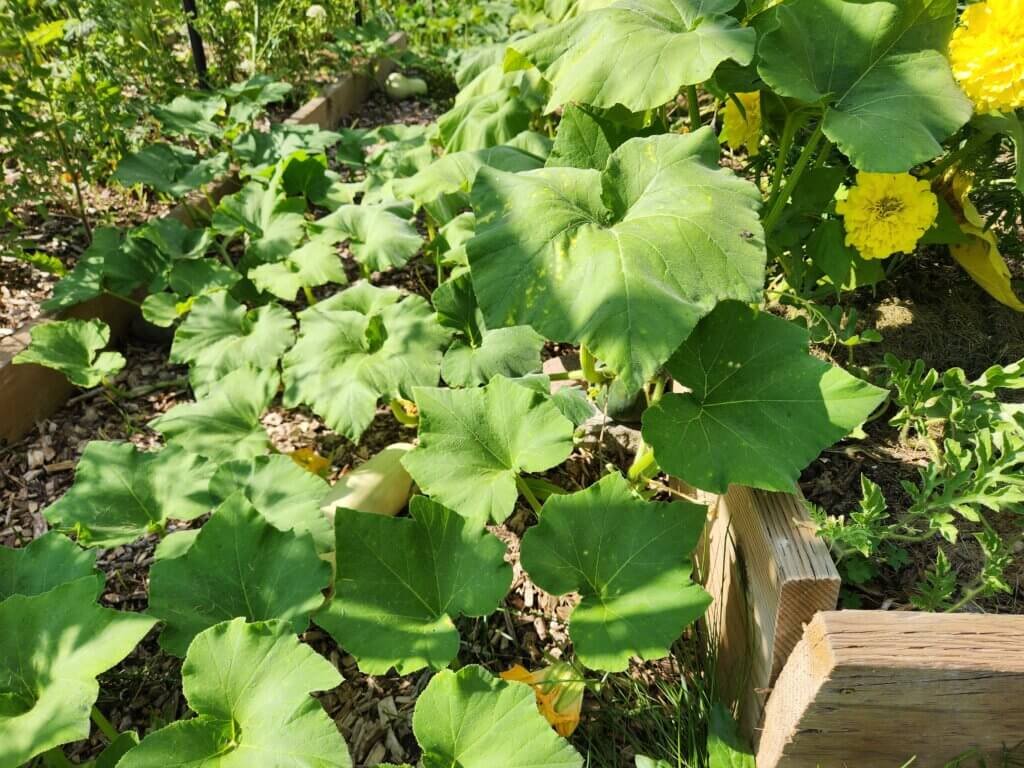
This leaves the middle of the raised bed available for other crops. We’ve grown beans, corn and herbs in the same bed while allowing the butternut squash vines to spread outside of it. The large, spiky squash leaves and stems also create a dense layer around the outside of the garden as the plants grow.
If you’re deciding what else to grow nearby, check out our companion planting guide for more ideas on planning plants together in the garden.
Can You Grow Butternut Squash On A Trellis?
Butternut squash can be grown on a trellis, but there are a couple of important factors to consider.
Unlike lighter crops such as cucumbers, mature butternut squash can put a lot of weight on the trellis, so you’ll need something sturdy enough to support both the vines and developing fruit. As the squash gets larger, the individual fruits may also need to be supported with a sling to prevent their weight from damaging the vine.
How To Care For Butternut Squash Plants
Once your butternut squash is planted and starts to grow, there isn’t a whole lot of maintenance required. The biggest things to keep an eye on throughout the growing season are water, nutrients and weeds.
Butternut squash plants grow quickly and produce some very long vines, so giving them what they need early in the season will help them continue to grow and produce squash throughout the summer.
How Much Water Does Butternut Squash Need?
Butternut squash needs consistent water throughout the growing season. Around 1 inch of water per week is a good starting point, either from rainfall or by watering the garden yourself. During hot and dry periods, the plants may need more.
Water becomes especially important once the plants begin flowering and developing fruit. Try to water deeply at the base of the plant rather than frequently giving them small amounts of water. This encourages the roots to grow deeper into the soil and also helps keep the leaves dry.
Should You Fertilize Butternut Squash?
Butternut squash are heavy feeders and will benefit from nutrient-rich soil throughout the growing season. We start by adding compost and organic matter to our garden beds before planting, which gives the plants a good source of nutrients as they get established.
As the plants grow, you can add more compost around the base of the plant or use a fertilizer if your soil needs it. Be careful with fertilizers that are very high in nitrogen later in the season. Too much nitrogen can encourage the plant to grow lots of large green leaves and vines instead of putting its energy into flowers and squash.
Should You Mulch Around Butternut Squash?
We use straw, wood chips and grass clippings for mulch throughout our garden, and butternut squash is no exception. A layer of mulch around the plants helps hold moisture in the soil, suppress weeds and eventually provides a barrier between the developing squash and the soil underneath.
In Zone 5, however, we don’t rush to mulch immediately after planting. Butternut squash loves warm soil, and a thick layer of mulch can prevent the sun from warming the soil as quickly in the spring. We like to give the soil a chance to warm up first and then add our mulch once the plants are established and the weather has warmed.
Butternut Squash Flowers And Pollination
Once your butternut squash plants are established, they will begin producing flowers. But seeing lots of flowers doesn’t necessarily mean you’ll end up with lots of squash. Butternut squash produces both male and female flowers, and the female flowers need to be successfully pollinated before they will develop into mature fruit.
Most of the time bees and other pollinators will take care of this for you, but sometimes they need a little help. Understanding the difference between male and female flowers and knowing how to hand pollinate can help if your plants are flowering but aren’t producing squash.
Male Vs Female Butternut Squash Flowers
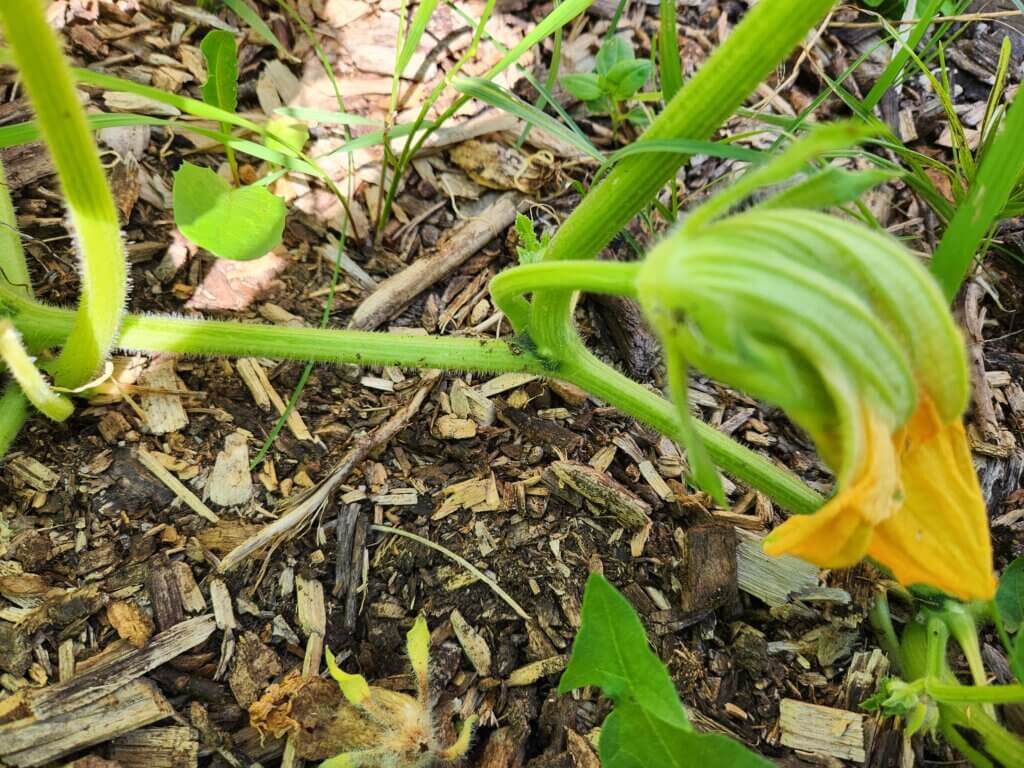
Butternut squash, like all squash varieties, produces both male and female flowers. The male flowers grow on a long, thin stem with the flower at the end.
Female flowers are easy to identify because they have what looks like a small, immature butternut squash directly behind the flower. This is the fruit that will continue to grow if the flower is successfully pollinated.
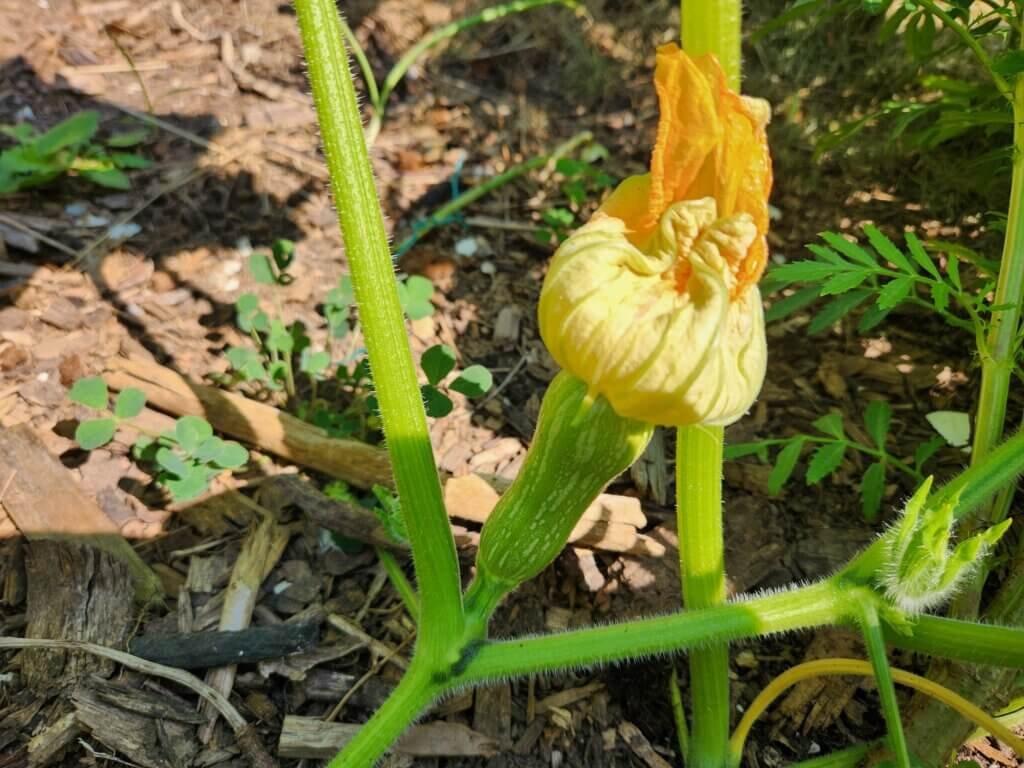
You need both male and female flowers for your plant to produce fully developed butternut squash. It’s also completely normal for the plant to produce male flowers before you start seeing female flowers.
How To Hand Pollinate Butternut Squash
First, you need to identify a male and female flower. This is easily done by looking directly behind the flower. A female flower will have a small immature squash behind it, while a male flower grows on a long, thin stem.
To hand pollinate, pick an open male flower and carefully remove the petals to expose the pollen-covered center. Take the male flower and gently rub the center against the center of an open female flower, making sure the pollen is transferred between the two.
It’s best to hand pollinate in the morning when the flowers are open. Bees and other pollinators will normally take care of pollination for you, but hand pollinating is an easy way to help make sure your female flowers are successfully pollinated.
Why Is My Butternut Squash Not Producing Fruit?
There are several reasons why your butternut squash plant may be flowering but not producing fruit.
- Only male flowers are growing: During the early growth stages, it’s common for butternut squash plants to produce mostly male flowers. As the plant becomes more established, female flowers should begin to appear.
- Poor pollination: If you’re not hand pollinating, there is always a chance that a female flower simply wasn’t successfully pollinated before it closed. When this happens, the small immature squash behind the flower may turn yellow, shrivel and eventually fall from the plant.
- Hot weather: A period of very hot weather can stress your butternut squash plants and interfere with flowering and successful pollination. This can cause flowers or small developing squash to drop from the plant.
- Plant stress: If small squash are forming and then turning yellow or dropping, look at the overall health of the plant. Poor pollination is a common cause, but inconsistent watering, extreme temperatures or other growing stresses can also contribute to young fruit failing to develop.
Common Butternut Squash Pests And Problems
Butternut squash plants are fairly easy to care for once established, but there are still a few pests and problems to watch for throughout the growing season. Squash vine borers and squash bugs can damage the plant itself, while powdery mildew is something we commonly see on squash leaves later in the summer.
Squash Vine Borers
The worst pest, Squash vine borers, can cause serious damage to squash plants by burrowing into the stem and feeding inside the vine. One of the first signs you may notice is a healthy-looking plant suddenly starting to wilt even though it has enough water.
Butternut squash does have an advantage over some other squash varieties because it tends to be more resistant to squash vine borer damage. That doesn’t mean your plants are completely safe, but they can often withstand vine borer pressure better than more susceptible squash varieties.
Keep an eye on the base of your vines throughout the summer for damage or sawdust-like material around the stem.
Squash Bugs
Squash bugs feed on the leaves and stems of butternut squash plants. A small number usually won’t destroy a healthy established plant, but a large infestation can cause leaves to wilt, yellow and eventually die.
Check underneath the large squash leaves regularly because this is where you’ll often find squash bugs and clusters of their eggs. Catching them early is much easier than dealing with a large population later in the summer.
Powdery Mildew
Powdery mildew is one of the most common problems you’ll see on butternut squash plants, especially later in the growing season. It appears as white, powdery-looking patches across the leaves and can gradually spread across the plant.
Give your butternut squash plenty of space for good airflow and try to water around the base of the plant rather than soaking the leaves. If you start seeing powdery mildew late in the summer, don’t immediately assume your crop is lost. Older squash leaves often start looking pretty rough toward the end of the season while the squash itself continues to mature.
When To Harvest Butternut Squash In Zone 5
Butternut squash has a long growing season and can take around 90–120 days to fully mature depending on the variety. In Zone 5, this means we’re usually harvesting our butternut squash toward the end of summer and into early fall.
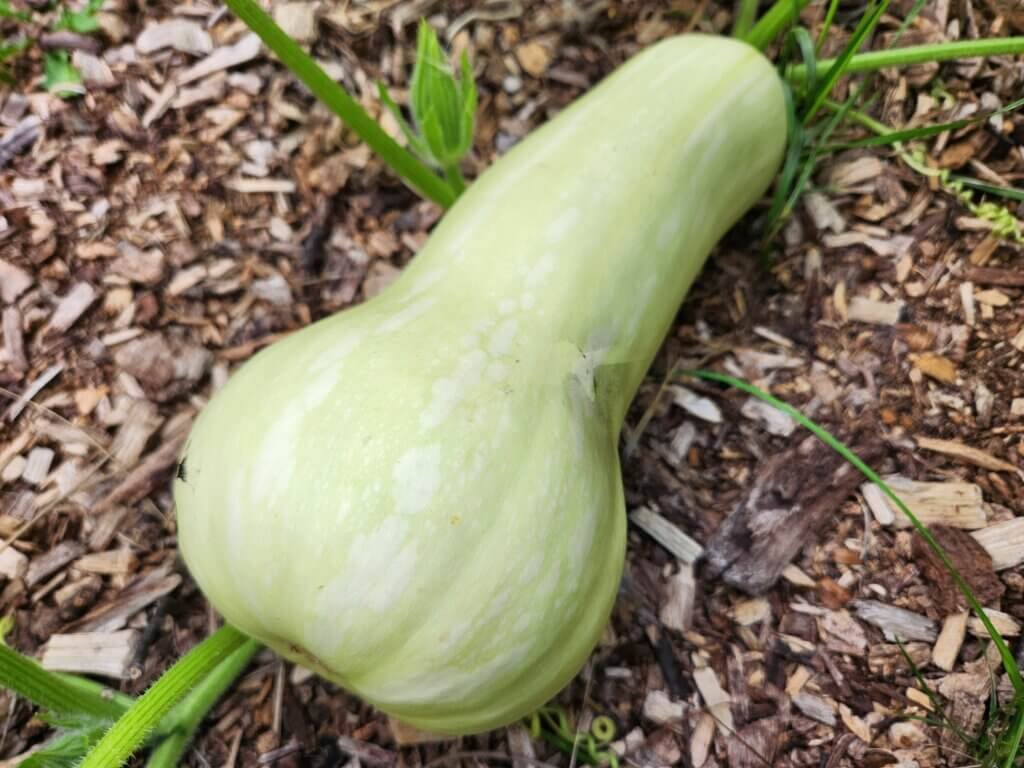
Don’t harvest them simply because they’ve reached a certain size. Butternut squash needs time on the vine for the skin to harden and the fruit to fully mature, especially if you’re planning on storing it through the winter.
How Do You Know When Butternut Squash Is Ripe?
There are a few easy ways to tell when butternut squash is ready to harvest. The first thing we look at is the colour. A mature butternut squash should have an even tan colour without the green colouring you see on younger squash.
The rind should also be hard. Try gently pressing your fingernail against the skin. If you can easily puncture or mark the rind, the squash probably needs more time to mature.
The stem will also begin to change as the squash ripens. Instead of being green and soft, it will become dry, hard and more cork-like. When you have a tan squash with a hard rind and drying stem, it’s a good indication that it’s ready to harvest.
What If Frost Is Coming Before My Butternut Squash Is Ripe?
This is one of the problems we run into growing butternut squash in Zone 5. Eventually fall arrives and you may still have squash on the vines that aren’t completely ripe.
If the squash is close to maturity and the weather is still cooperating, we leave it on the vine as long as possible. Every extra frost-free day gives the squash more time to mature and harden its rind.
If frost is in the forecast, however, don’t risk leaving your entire harvest outside. Butternut squash is a warm-season plant and freezing temperatures can damage both the fruit and the vines.
Harvest any mature squash before a frost. Squash that is nearly mature can also be harvested, although it may not store as well as squash that was allowed to fully mature on the vine. Use these squash first rather than relying on them for long-term winter storage.
How To Harvest Butternut Squash
When your butternut squash is ready, don’t pull or twist it from the vine. Use a clean pair of garden shears or pruners to cut through the stem.
Leave a few inches of stem attached to the squash when you harvest it. The stem helps protect the fruit during curing and storage, so avoid carrying your squash by the stem or accidentally breaking it off.
Handle freshly harvested butternut squash carefully. Cuts, bruises and damaged skin can shorten its storage life and create an opportunity for rot to develop.
How To Cure Butternut Squash After Harvesting
If you’re planning on storing butternut squash, curing it after harvest helps harden the skin and prepare it for long-term storage. We use a similar process for curing pumpkins after harvesting before putting them into storage for the fall and winter.
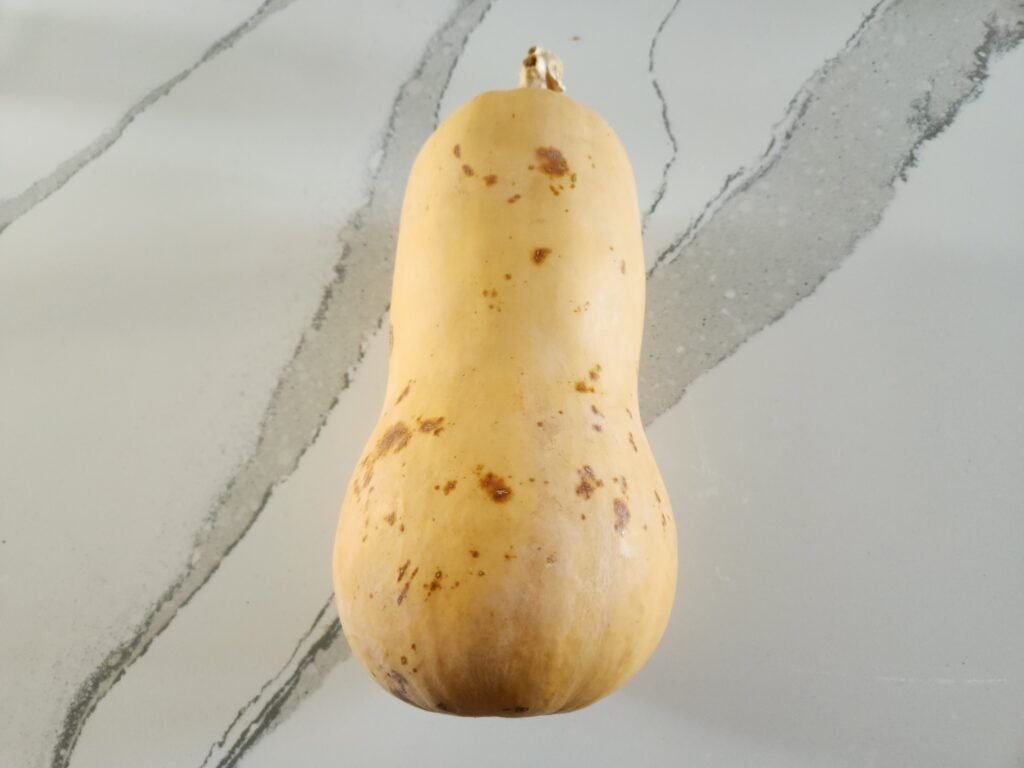
We cure our winter squash in a warm, dry location with good airflow. Butternut squash can generally be cured for about 1–2 weeks before being moved into storage. Keep the squash dry during this time and leave some space between each one so air can circulate around them.
Before curing, inspect each squash for cuts, bruises or other damage. Damaged squash should be set aside and used first rather than being stored with the rest of your harvest.
How To Store Butternut Squash
One of the biggest benefits of growing butternut squash is how long it can last after harvest. Once properly cured, move your squash somewhere cool, dry and well ventilated for storage.
Don’t pile the squash on top of each other. Leave some room around each one for airflow and check them periodically throughout the winter. Properly harvested, cured and stored butternut squash can last for several months.
Our complete guide on how to store butternut squash covers the curing process, ideal storage conditions and how we’ve managed to keep our squash for as long as 10 months.
Frequently Asked Questions About Growing Butternut Squash
Most butternut squash varieties take around 90–120 days to mature. This is one of the reasons we prefer starting our seeds indoors in Zone 5. Giving the plants even a small head start gives them more time to produce mature squash before our first fall frost.
The number of squash you get from each plant will depend on the variety, growing conditions and health of the plant. A healthy butternut squash plant can commonly produce several mature squash during the growing season.
Butternut squash can be grown in a large container, but keep in mind how big the plant will eventually become. The roots need plenty of room, and the long vines still need somewhere to grow.
Yellow leaves can have several causes. Older leaves will naturally begin to yellow as the season progresses, but yellowing earlier in the season can be a sign of too much or too little water, nutrient problems, pests or disease.
Look at the entire plant rather than a single yellow leaf. If the newer growth looks healthy and the plant continues producing flowers and fruit, an occasional older yellow leaf usually isn’t something we’re concerned about.
Butternut squash is best left on the vine until it is fully mature whenever possible. Squash that is close to maturity may continue to change somewhat after being harvested. An immature green squash won’t reliably become the same as one that was allowed to fully mature on the vine.
Yes, immature butternut squash is edible. It won’t be as sweet or have the same dense texture as a fully mature squash, but it can still be cooked and eaten. Immature squash also won’t store as well, so if we have to harvest ours early before a frost, we use those first and save the fully mature squash for long-term storage.
Conclusion
Growing butternut squash in Zone 5 takes a little planning, but once the plants get established they don’t require a lot of work. Starting our seeds indoors gives us a small head start. From there we give the plants plenty of sun, water and room to spread. By the end of summer, we’re rewarded with butternut squash that we can cure and store to use all fall and winter.
If you’re looking to grow more of your own food, check out our other growing guides for everything we’re growing here at DBS Farm Wilson.